blog ▸ oauth docs
Setting up "Subscribe Anonymously" on your WordPress Newsletter
Privacy-Portal
2024-10-15
26 MIN READ
How often do privacy concerns deter visitors from registering for your newsletter?
Introducing Subscribe Anonymously with Privacy Portal - a feature designed to offer all the advantages of your newsletter with none of the privacy drawbacks.
When users opt to Subscribe Anonymously, they enroll using Privacy Aliases instead of their personal email addresses. Here’s how it works:
- Unique Aliases: Each subscriber receives a unique alias that only accepts emails from your domains, effectively blocking external spam.
- Privacy Protection: This system ensures that your subscribers’ actual email addresses remain confidential, preventing you from inadvertently or otherwise sharing or selling these addresses to third parties. Even aliases cannot be shared or sold due to the sender domain restrictions.
- Full Control: Subscribers can deactivate their aliases at any time, giving them the power to shield their inbox if they ever receive unwanted emails.
With Privacy Portal, you provide a secure way for users to enjoy your content without compromising their privacy. In this tutorial, we will show you how to quickly set up Subscribe Anonymously for your WordPress Newsletter. Let’s dive in!
Step 1 - Install the Privacy Portal SSO plugin on WordPress
- In your WordPress admin console, simply go to the “Plugins > Add Plugins” page.
- Install and Activate the “Privacy Portal SSO” plugin.
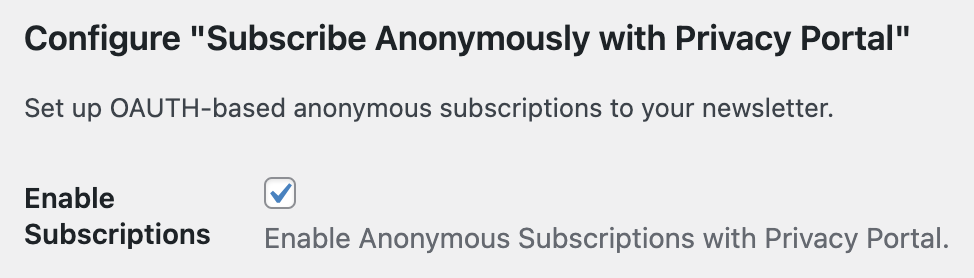
- Go to the plugin settings page: “Settings > Privacy Portal SSO”.
- Check “Enable Subscriptions” and save the changes.
Now you should be able to see the redirect_uri for your site. You will need it to configure your OAuth application with Privacy Portal.
Step 2 - Register your OAuth App
- Go to the Privacy Portal App.
- Create you free account (in case you don’t already have one).
- Open to Developer Settings.
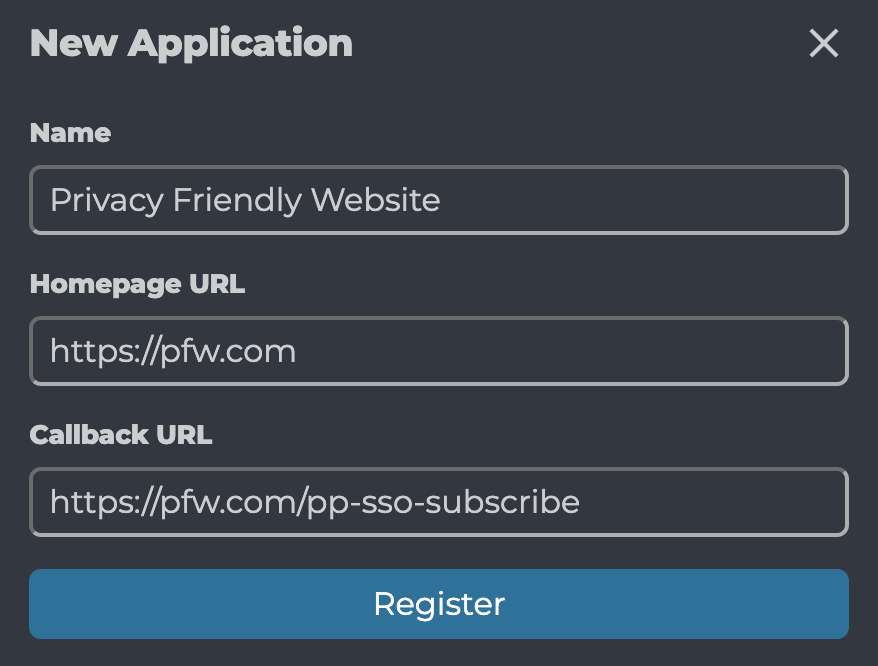
- Tap on “New Application” to register your OAuth Application.
- Fill in the information requested then tap on “Register”.
Step 3 - Get your App Credentials
- Go to Developer Settings.
- Select the OAuth Application you just created.
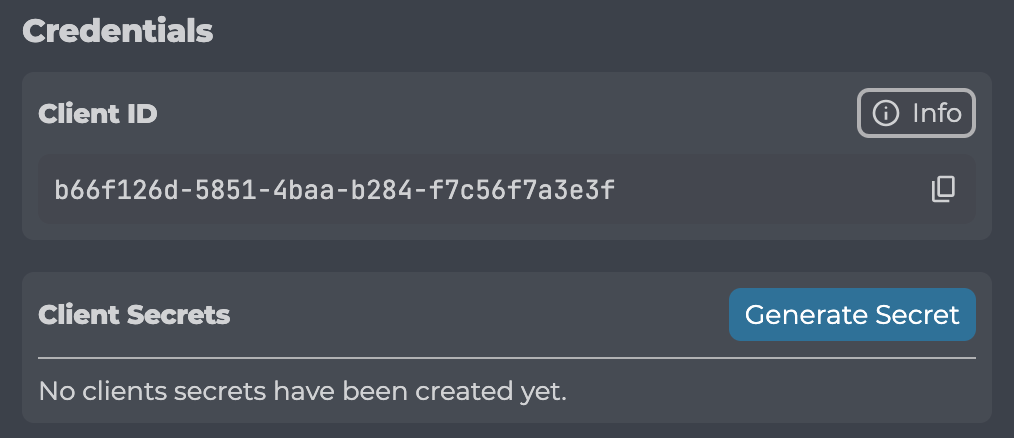
- Under “Credentials”, copy your Application’s
client_id. - Also under “Credentials”, tap on “Generate Secret” and copy the
client_secret.
Note that the client_secret will only be displayed to you once. Make sure to treat it as a password and store it securely.
Step 4 - Configure the Plugin
- Go back to the plugin settings page: Settings > Privacy Portal SSO.
- Enter the Client ID and the Client Secret that we got in Step 3 and save the changes.

Step 5 - Save Permalinks
Privacy Portal SSO uses custom permalinks during redirection that can only be enabled manually.
- Go to the Permalinks page under Settings > Permalinks
- Without making any changes to the page, simply tap on Save Changes
Step 6 - Integrate with your existing newsletter plugin
At the time of writing, Privacy Portal SSO integrates with 4 newsletter plugins:
- MailPoet
- MC4WP (MailChimp for WordPress)
- The Newsletter Plugin
- Kit (formerly ConvertKit)
If you’re using one of these plugins for your newsletter, you can integrate the “Subscribe Anonymously” feature with your newsletter.
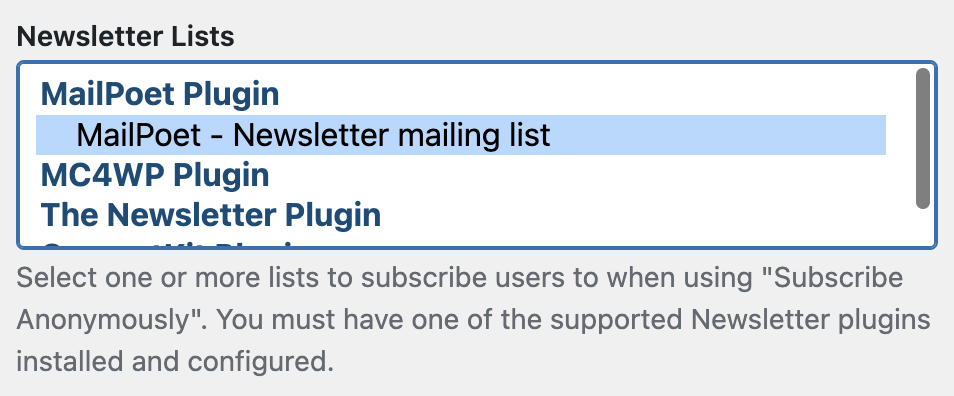
- Go to the plugin settings page: Settings > Privacy Portal SSO.
- Under the “Newsletter Lists”, select one or more lists to subscribe users to when using “Subscribe Anonymously”.
- Click on “Save Changes” to save your selection.
Step 7 - Configure Mail Relay
Now that you’ve set up “Subscribe Anonymously with Privacy Portal”, users will be able to enroll to your newsletter using Privacy Aliases. In order to send emails to your users through Mail Relay, you will need to verify your ownership of the sending domain name.
- Go to the Privacy Portal App.
- Select the OAuth Application of your site.
- Under “Mail Relay”, find your sending domain and tap on
verify. - Follow the steps to verify your ownership of the domain name.
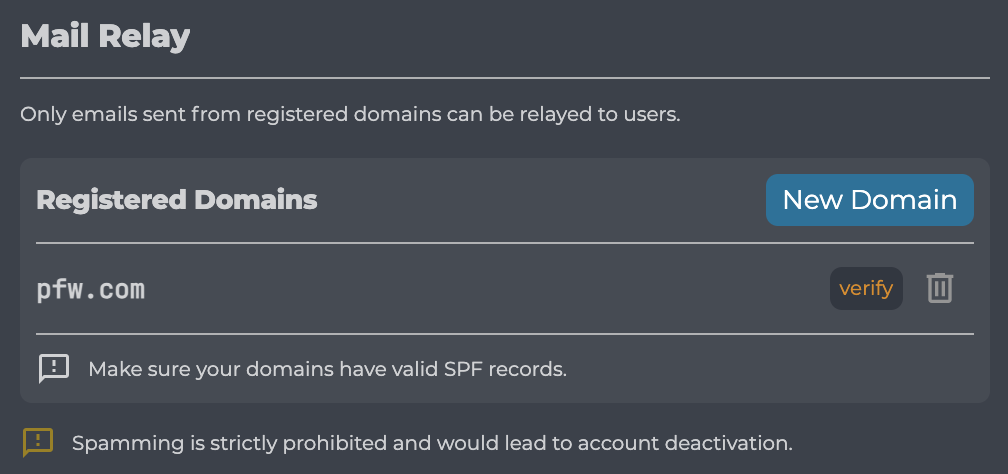
Once domain verification is completed, you should be able to send emails to your users. Make sure your email is configured correctly to prevent email spoofing using SPF, DKIM, and DMARC. We strictly enforce these security configurations for OAuth applications to keep our users safe.
Step 8 - Enable Public Access
- Go back to the Privacy Portal App.
- Go to the Developer Settings.
- Under “Access Management”, enable “Public Access”.
Now anyone should be able to enroll to your newsletter.

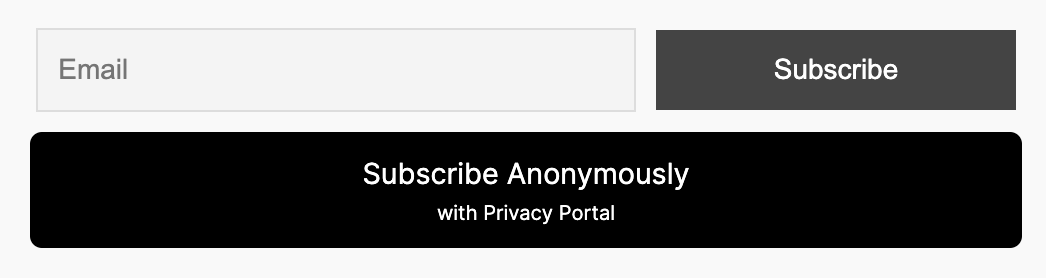
Step 9 - Update your newsletter form to add the “Subscribe Anonymously” button
We support multiple ways to add buttons to allow you to bypass any plugin specific limitations.
MailPoet Form
MailPoet does not allow using shortcodes inside forms. Here are the steps you need to follow to add the “Subscribe Anonymously” button.
- Open the newsletter form in editing mode.
- Insert a “Custom HTML” element under the submit button. You could add a divider before it for styling.
- Add the following html content (or custom text):
<!-- example button -->
<div class="pp-sso-button">
  <a href="{pp_sso_subscribe_anonymously_url}">
    <span class="title">Subscribe Anonymously</span>
    <span class="subtitle">with Privacy Portal</span>
  </a>
  <div class="pp-sso-message"><small>{pp_sso_subscribe_anonymously_message}</small></div>
</div>- Uncheck the “Automatically add paragraphs”.
- Style the button to your liking under the “Custom CSS” section of the “Form” tab.
/* example styling */
.pp-sso-button > a {
  display: flex;
  flex-direction: column;
  width: 100%;
  padding: 10px 0px;
  background-color: black;
  color: white;
  text-decoration: none;
  text-align: center;
  border: 1px solid white;
  border-radius: 6px;
}

.pp-sso-button > a:hover {
  background-color: #333;
}

.pp-sso-button > a > .title {
  font-size: 16px;
}

.pp-sso-button > a > .subtitle {
  font-size: 12px;
}

.pp-sso-button > .pp-sso-message {
  color: #cf2e2e;
  font-size: 14px;
}

.pp-sso-button > .pp-sso-message:empty {
  /* do not display the message element when there's no message */
  display: none;
}- Save the form.
MC4WP Form
MailChimp for WordPress forms allow you to edit html directly. You can simply add the button using the shortcode. Notice that the shortcode supports styling:
[pp_sso_subscribe_anonymously_button style_background_color="black" style_color="white" style_font_size="14px" style_font_weight="strong" style_font_family="Arial, Helvetica, sans-serif"
style_padding="10px" style_margin="0px" style_border_radius="6px"]
Kit (formerly ConvertKit) Form
Kit forms can be added to your site as a Custom HTML element (you can copy the form html from the Kit website). In order to integrate the “Subscribe Anonymously” button, you will need to manually edit the HTML to add the “Subscribe Anonymously” shortcode after the submit button.
<!--
  Within the HTML of the Kit Form, right after the submit button,
  insert the following shortcode and edit the styling to your liking
-->
[pp_sso_subscribe_anonymously_button]
The Newsletter Plugin
The Newsletter Plugin can be integrated to your pages using a shortcode. You can also integrate the “Subscribe Anonymously” button in the same manner. Simply add both shortcodes with wrapper html inside a Custom HTML element. Here’s an example of how this can be achieved:
<div style="padding:20px" class="wp-block-tnp-minimal">
  <p>Subscribe to our newsletter!</p>
  <div>[newsletter_form type="minimal"]</div>
  <div>[pp_sso_subscribe_anonymously_button]</div>
</div>